Meeting Notes on Autopilot with tl;dv & Livespace Integration
Table of Contents:
In sales, every moment spent on administrative tasks is time away from building customer relationships and closing deals. The constant juggle between engaging with prospects and documenting interactions often leads to compromised conversation quality or incomplete records.
Balancing prospect engagement with keeping accurate records is a common challenge. That’s why we created a smarter solution by integrating two tools: tl;dv and our Livespace CRM. This connection saves time, keeps records up-to-date, and lets you focus on building relationships and closing deals.
Now, we’re thrilled to share this solution with you!
This guide will show you how to eliminate this challenge by connecting two powerful tools: tl;dv and Livespace CRM using simple Zapier integration.
Implementation Guide: Connecting tl;dv with Livespace
Setting up this integration requires careful configuration in Zapier. Here’s your step-by-step guide:
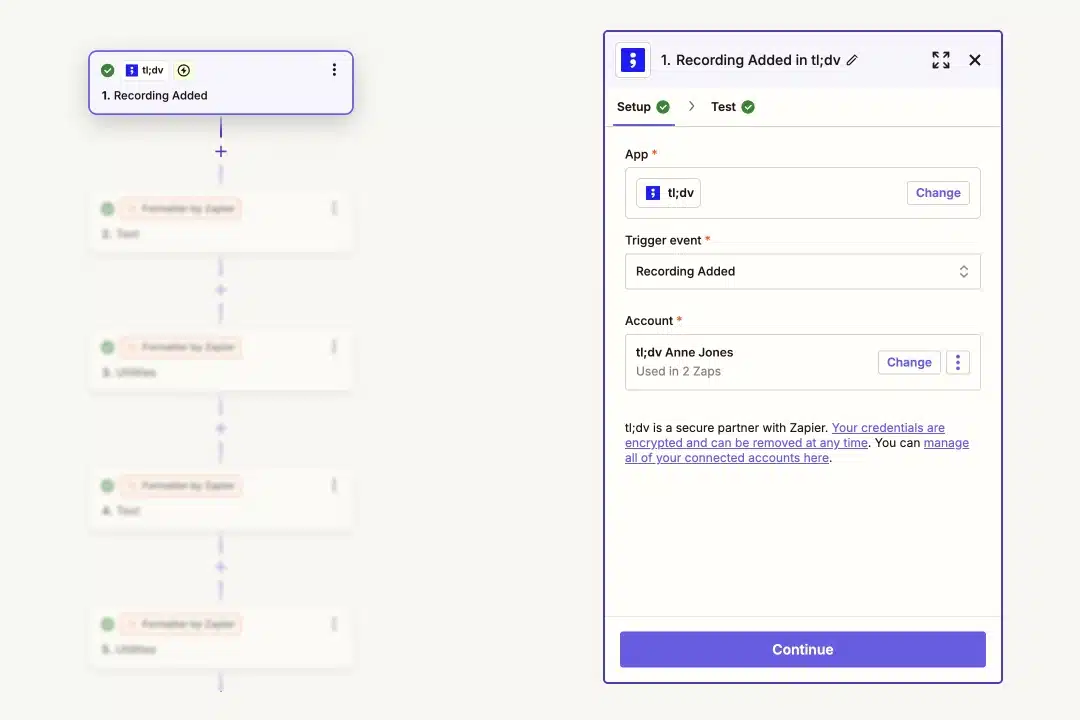
Step 1: Connect tl;dv to Zapier
Let’s connect tl;dv with Zapier to automate your recordings. Here’s what to do:
- Open Zapier and search for and select “tl;dv”
- Select “Recording Added” in the trigger options.
- Connect your tl;dv account when prompted and click Continue.
- Run a quick, automated test to make sure everything’s properly connected.
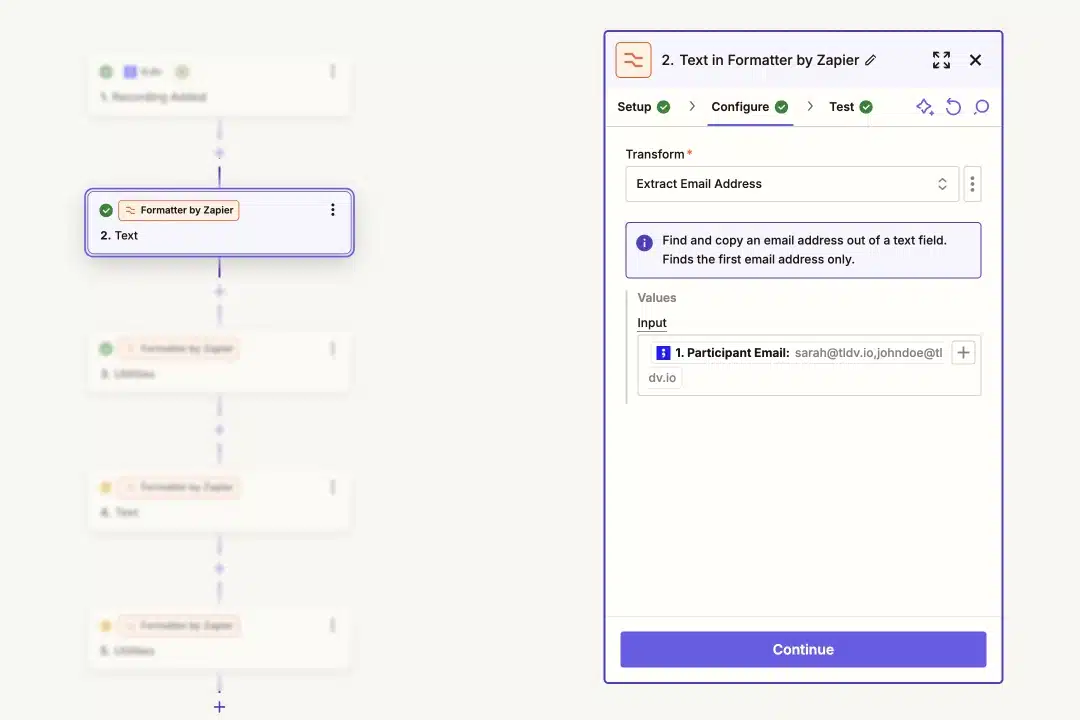
Step 2: Extract Email Addresses with Formatter
To make use of participant email addresses in later steps, you’ll need to extract them from your tl;dv recordings.
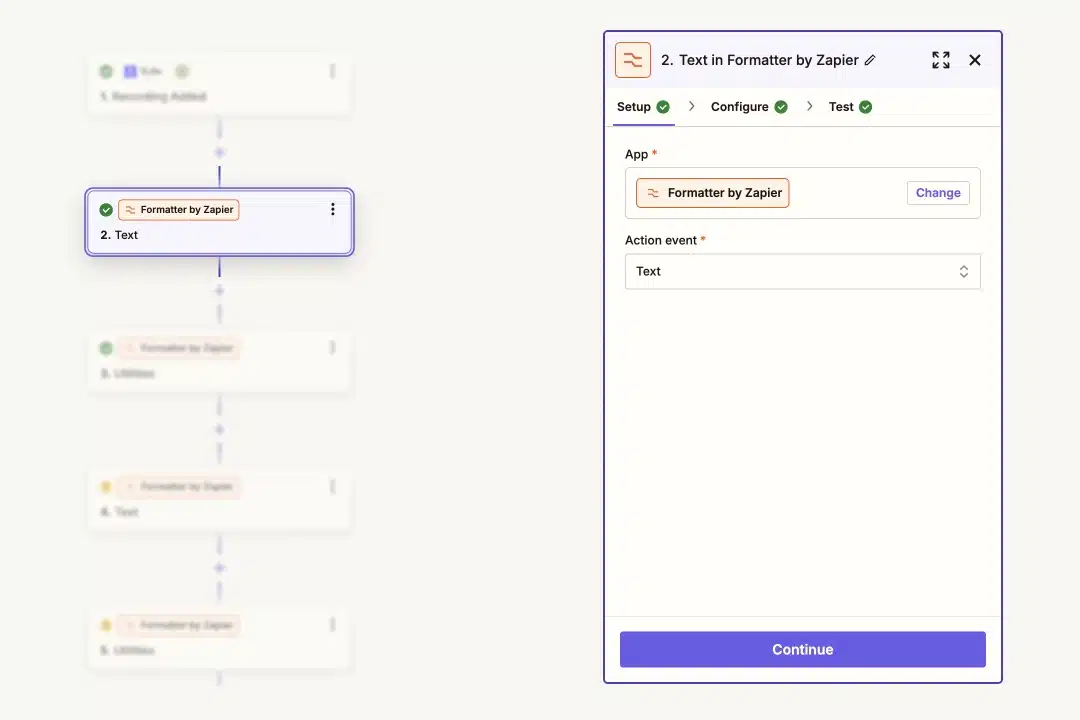
- Select Formatter and choose Text as the Action Event.
- In the Configuration part:
- Set the Transform field to Extract Email Address.
- In the input field, choose Participant email, and click b.
- Test the configuration, then move to the next step.
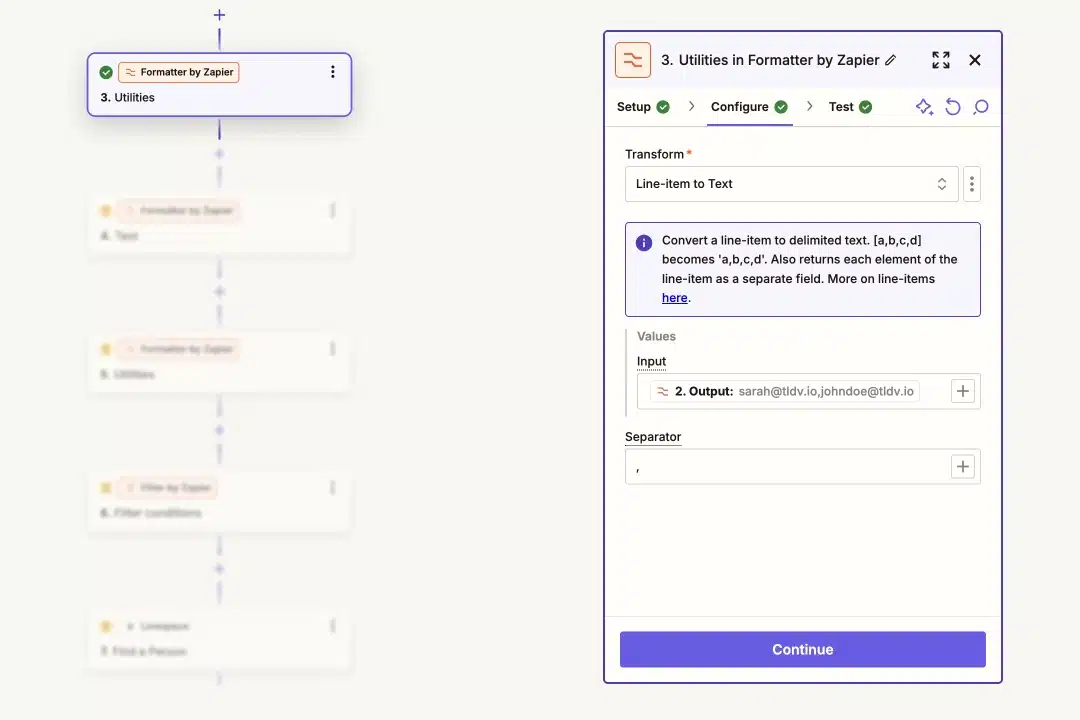
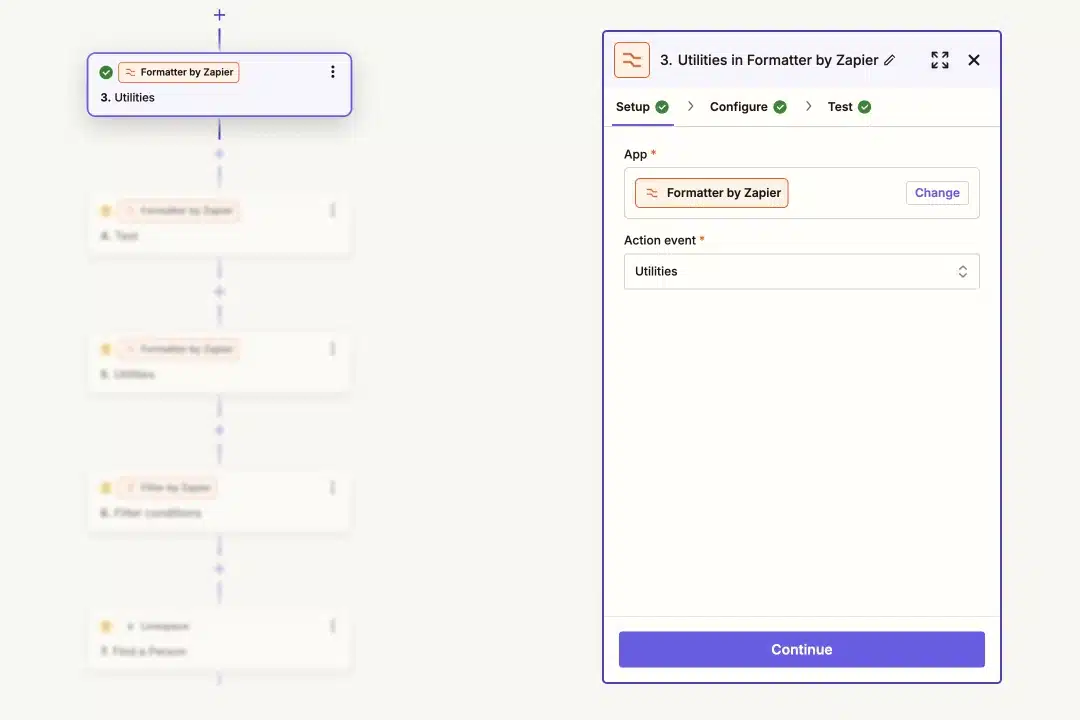
Step 3: Reformat Line Items with Utilities
The last step grabbed participants’ email addresses. Now, let’s format them properly so they’re easier to use.
- First, select Formatter, choose Utilities as the Action Event, and click Continue.
- In the Configuration:
- In the Transform field, choose Line-item to Text,
- In the Input field, select 2. Output, which is participant’s email
- In the separator field put a comma, and click Continue.
- Test the setup.
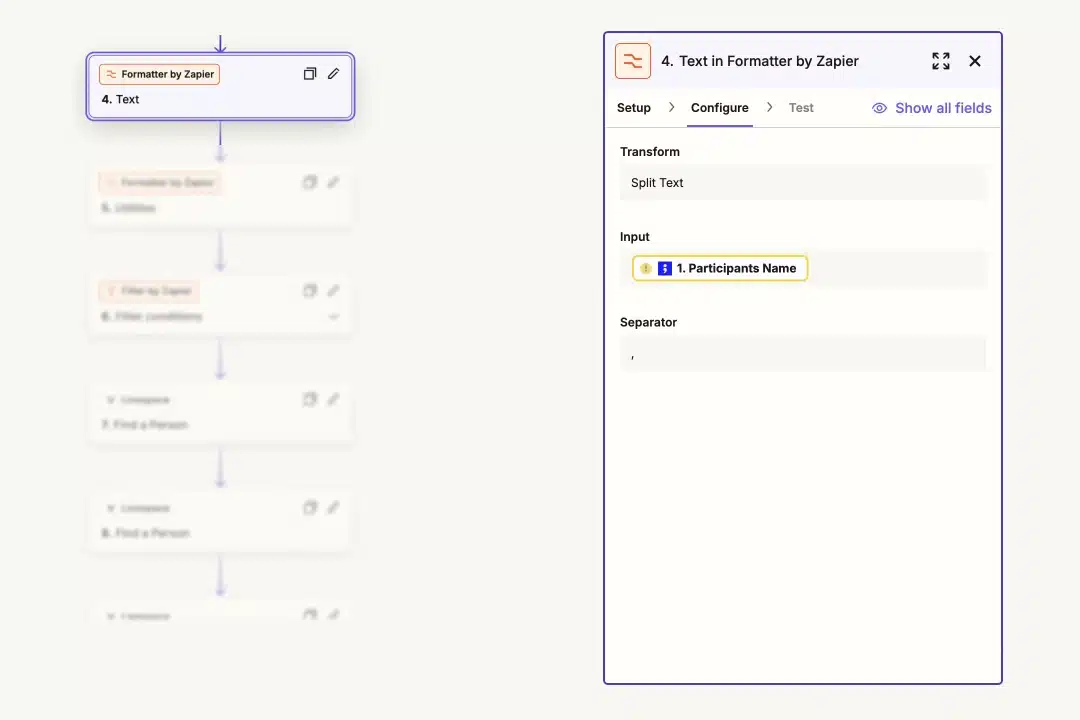
Step 4: Split Text to Extract Names
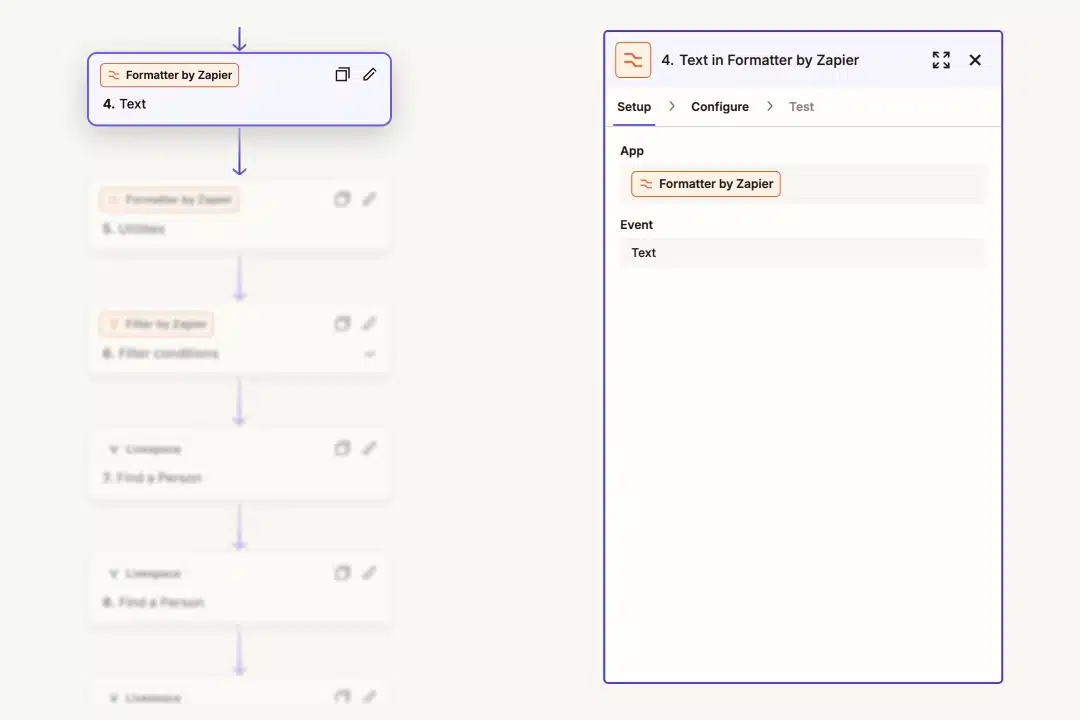
This step allows you to break down a list of participant names and pick individual ones for later actions. Here’s how:
- Select Formatter, choose Text as the Action Event, and click Continue.
- In the Configuration:
- In the Transform field, choose Split Text,
- As your input, select Participants Name
- In the separator field put a comma, and click Continue.
- Test the setup, and move the next step.
Step 5: Reformat Text for Consistency
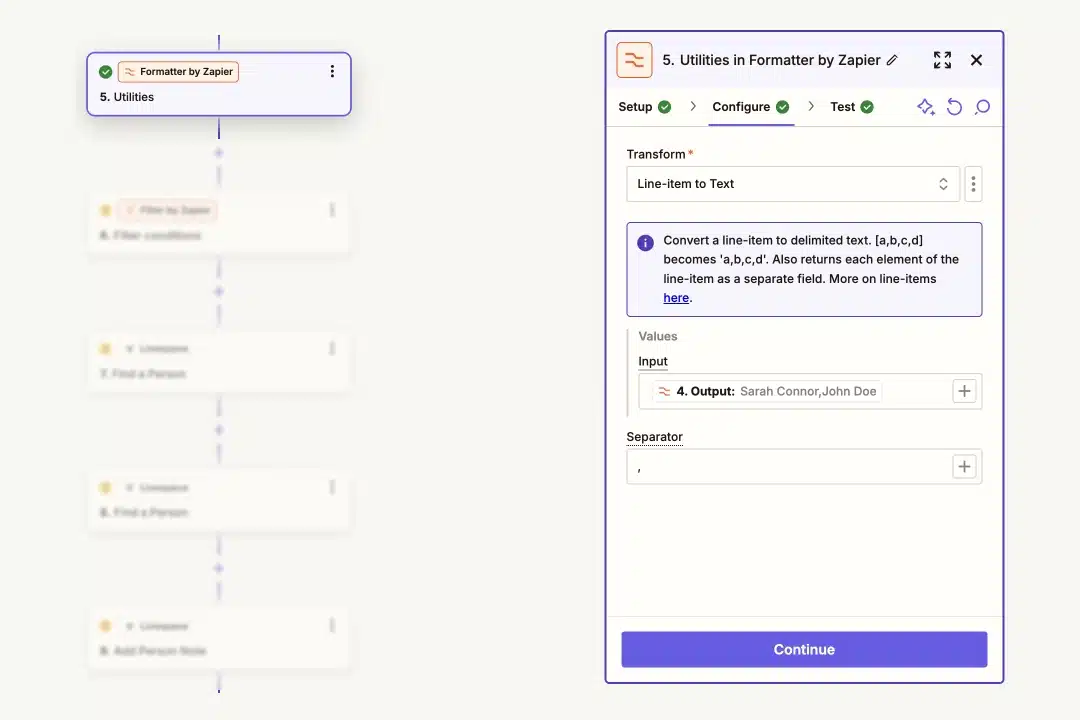
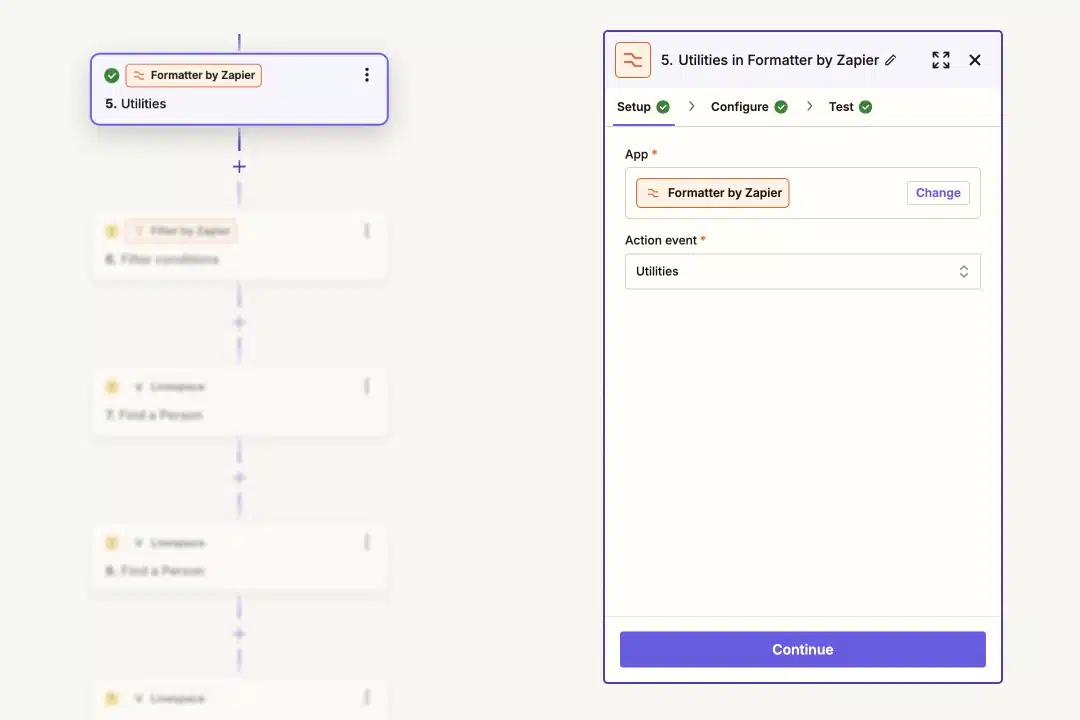
The last step grabbed participants’ names. Now, let’s format them properly so they’re easier to use.
- Select Formatter, choose Utilities as the Action Event, and click Continue.
- In the Configuration,
- Set the Transform field as Line-item to Text,
- In the Input field, select 4. Output, which is the participant’s name
- In the separator field put a comma, and click Continue.
- Test the setup and move forward.
Step 6: Filter External Meetings
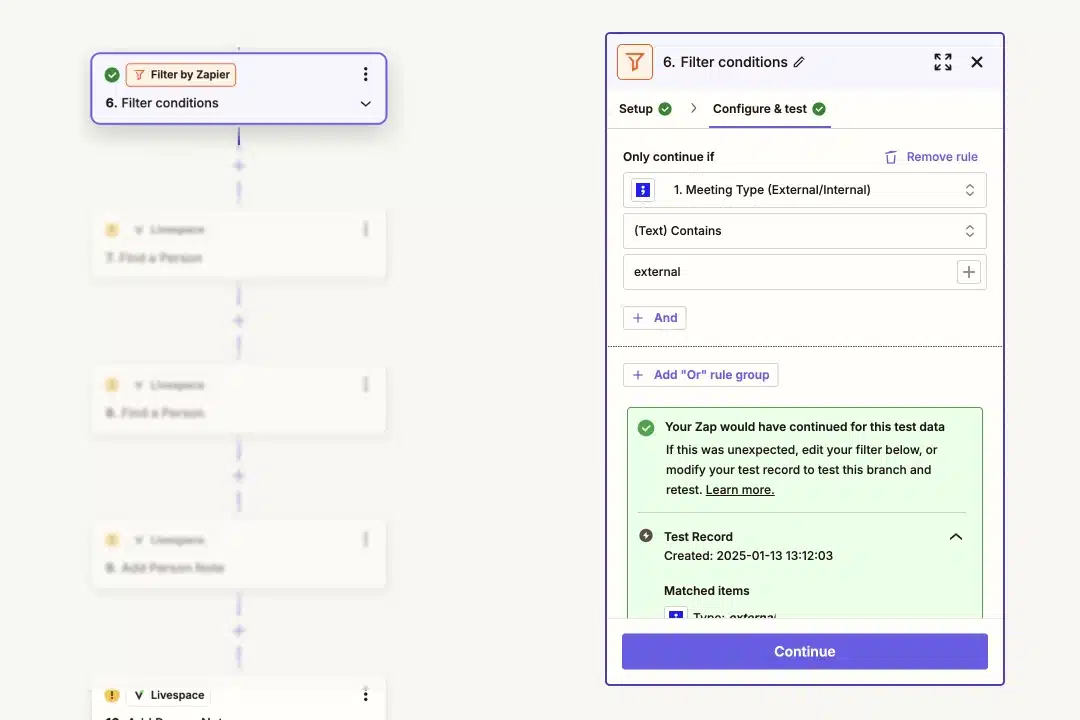
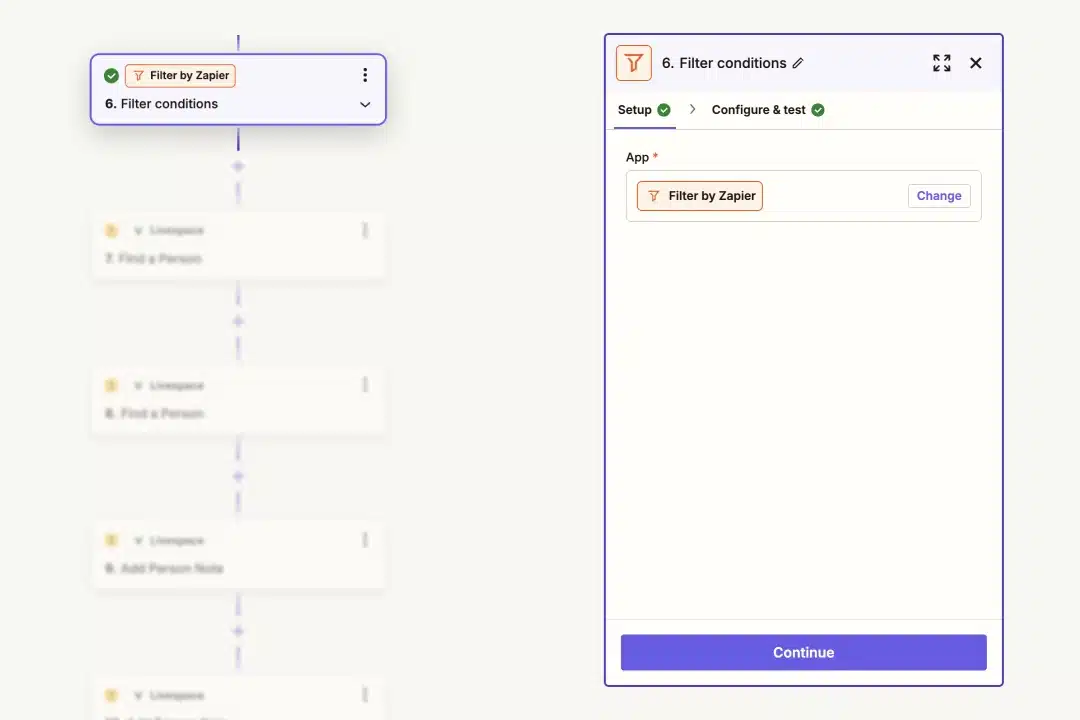
Want to focus on meetings with participants outside of your own workspace and domain? Let’s set up a filter to handle only your external meetings:
- Select Filter as the app and click Continue.
- In the Configuration part:
- Select Meeting type (External/Internal)
- Choose (Text) Contains
- Type “external” so that you’re processing only the meeting with users from external domains.
- Click Continue
- Test the filter, and move to the next step.
Step 7 & 8: Find or Create a Person in Livespace
The next step is to handle your participant’s contact information in Livespace. We’ll either find their existing contact or create a new one if they’re not in the system yet:
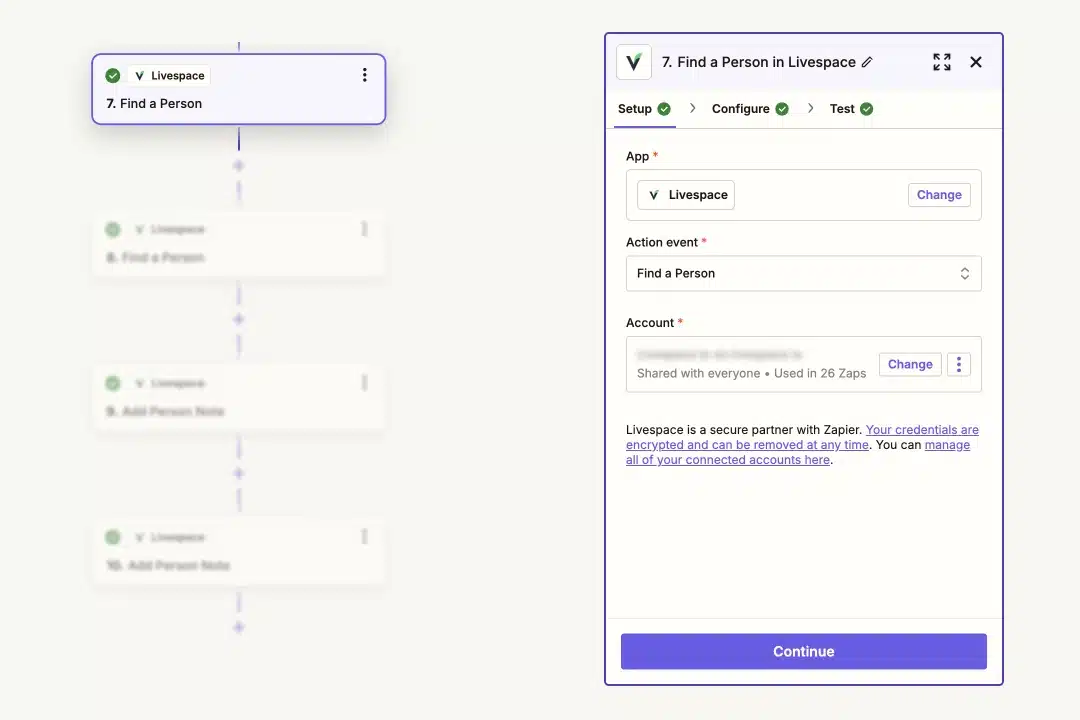
- Select Livespace as the app and choose Find a Person as the Action Event.
- Connect your Livespace account and click Continue.
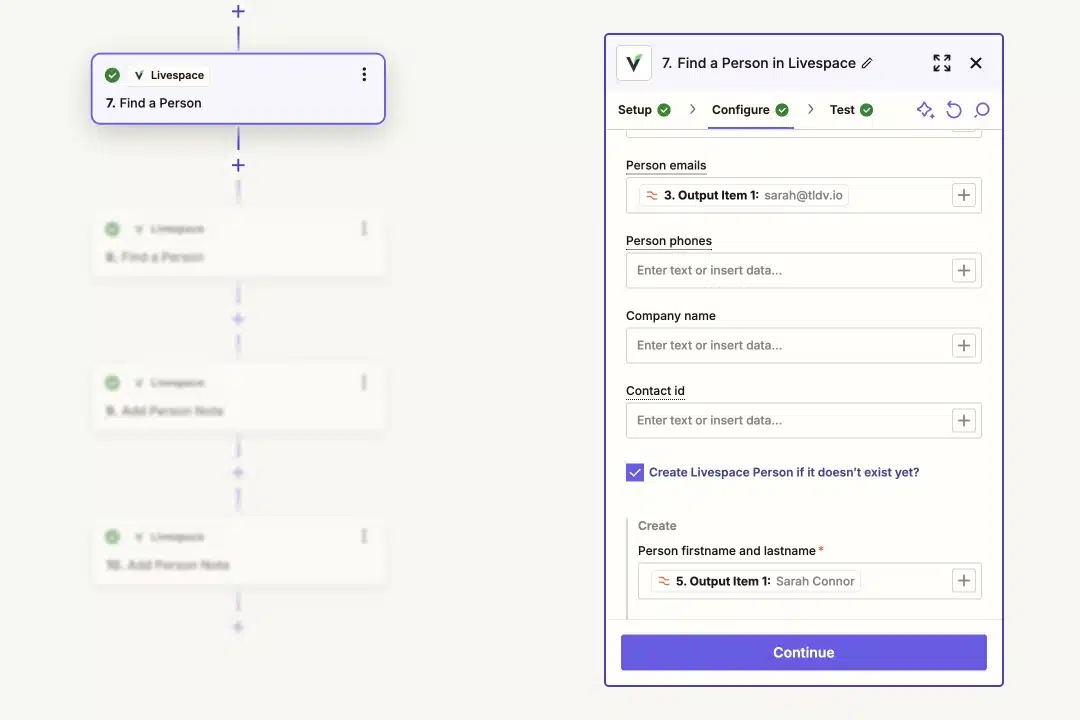
- In the Person email field, select the Output item with an email address
- Ensure the checkbox for Create Livespace Person if it doesn’t exist yet is selected
- Next, add the following information as Outputs:
- Person firstname and lastname
- Person emails
- Test the setup and move to the next step,
⚠️ Multiple participants? Duplicate this step, but remember:
- First setup: Select Participant 1’s email as output
- Second setup: Select Participant 2’s email as output
Step 9 & 10: Add a Meeting Note in Livespace
Finally, let’s log the meeting details in Livespace by adding a note to the person’s profile:
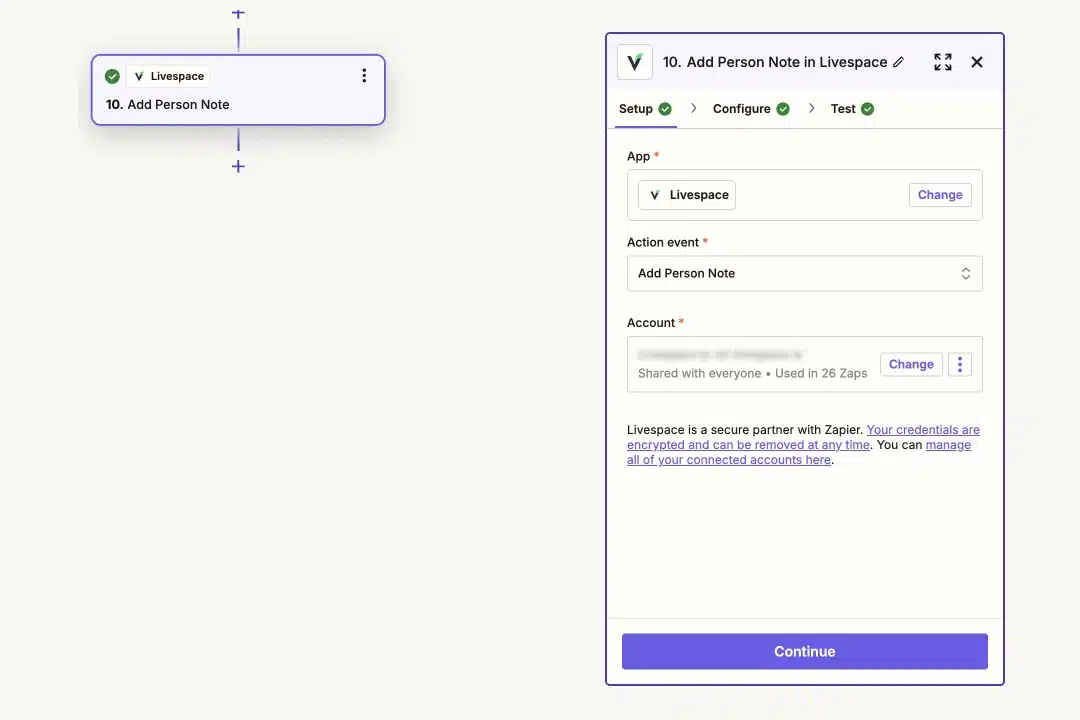
- Select Livespace as the app and choose Add Person Note as the Action Event.
- Connect your Livespace account and click Continue.
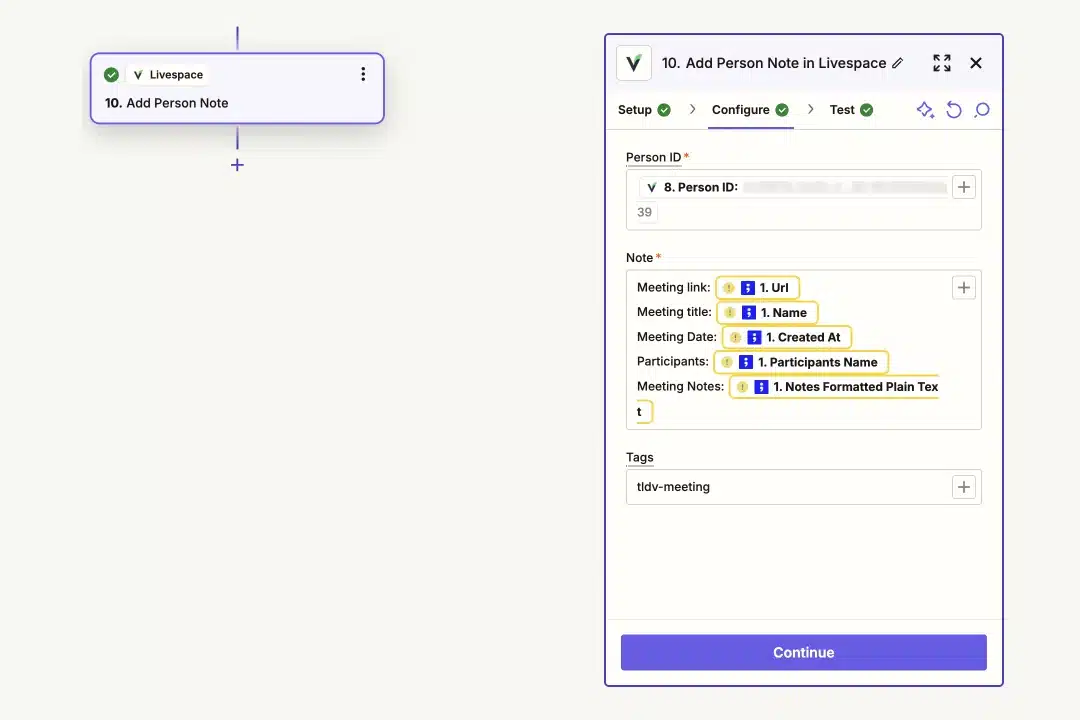
- Choose the Person ID field in the Output from the “Find a Person” step.
- Add meeting details in the Note field by selecting fields such as (we recommend to add each element in a separate line):
- Meeting Recording Link
- Meeting Title
- Meeting Recorded at
- Participant name
- Notes without Timestamps
- Optionally, add a tag (e.g., “tldv-meeting”).
- Test the setup, and your Zap is ready!
⚠️ Multiple participants? Duplicate this step, but remember:
- First setup: Select Participant 1’s ID as output
- Second setup: Select Participant 2’s ID as output
Understanding the Tools
tl;dv: Your AI-powered Meeting Assistant
tl;dv serves as your dedicated meeting documentation specialist, capturing every sales conversation across platforms like Google Meet, Zoom, and MS Teams. It goes beyond simple recording by providing intelligent transcription and making every conversation searchable.
Whether you need to revisit a specific discussion point or share key moments with team members, tl;dv ensures that no valuable information is lost.
Livespace: Your Ultimate CRM Solution
Livespace transforms traditional customer relationship management into a dynamic sales command center. It orchestrates your entire sales process, from initial contact to closed deal, while maintaining a detailed history of all customer interactions.
By centralizing your sales operations, Livespace gives you clear visibility into your pipeline and helps drive informed decisions based on comprehensive customer data.
The Power of Integration
When tl;dv and Livespace work together through Zapier, they create a documentation workflow that elevates your sales process. Every sales call recorded in tl;dv automatically finds its place in Livespace, attaching itself to the relevant contact or deal. This integration eliminates the manual work of updating records and ensures that your CRM always contains the full context of every customer interaction.
The synergy between these tools transforms how your team manages customer information. Sales representatives can focus entirely on building relationships during calls, knowing that every important detail is being captured and organized automatically. When they need to follow up or prepare for the next interaction, they’ll find complete conversation histories, including recordings and transcripts, right where they need them in Livespace.
Maximizing Your Integration
To get the most value from this automation, establish these key practices:
Keep your meeting protocols consistent. Use standardized naming conventions and ensure proper participant identification in every call. This consistency helps maintain clean, organized records in your CRM.
Regularly review your automation performance. Check that recordings are being properly categorized and that meeting notes are appearing in the right contact records. This oversight helps catch and address any issues early.
Train your team thoroughly. Ensure everyone understands how to access and utilize the automated documentation. This knowledge empowers them to make the most of the available information during follow-ups and strategic planning.
Conclusion
The integration of tl;dv and Livespace CRM through Zapier represents more than just a technical connection – it’s a transformation of your sales documentation process. By automating the capture and organization of meeting information, your team can focus on what truly matters: building relationships and closing deals.
The result is a more efficient, more effective sales operation where every customer interaction is preserved and easily accessible. No more compromising between active listening and note-taking, no more post-meeting scramble to document discussions, and no more lost opportunities due to missing information.
Other posts
How to Create a Sales Performance Improvement Plan in 7 Steps [+FREE TEMPLATE]
7 most widely used sales reports (with free downloadable templates)
